Using Paraview
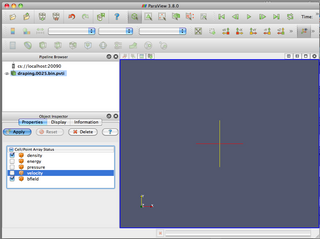
ParaView is a powerful, parallel, client-server based visualization system that allows you to use SciNet's GPC nodes to render data on SciNet, and manipulate the results interactively on your own desktop. To use the paraview server on SciNet is much like using it locally, but there is an additional step in setting up a connection directly between your desktop and the compute nodes.
Installing ParaView
To use Paraview, you will have to have the client software installed on your system; you will need ParaView 3.8.0 from the Paraview website. Binaries exist for Linux, Mac, and Windows systems. The client version must exactly match the version installed on the server, currently 3.8.0. The client version has all the functionality of the server, and can analyze data locally.
SSH Forwarding For ParaView
To interactively use the ParaView server on GPC, you will have to work some ssh magic to allow the client on your desktop to connect to the server through the scinet login nodes. The steps required are
- Log into the head node that you'll be using the server on
- (Mac or Linux): Edit your local ~/.ssh/config to enable forwarding to that node
- Start ssh forwarding
- Start server
- Connecting client and server
Log into node
The first thing to do is to go to the node from which you'll start the ParaView server. This is typically done by starting an interactive job on the GPC, perhaps on the debug or largemem queues. Paraview can in principle make use of as many nodes as you throw at it. So one might begin jobs as below:
qsub -l nodes=1:ppn=16,walltime=1:00:00 -q largemem -I
qsub -l nodes=2:ppn=8,walltime=1:00:00 -q debug -I
Once this job has started, you'll be placed in a shell on the head node of the job; typing `
hostname
' will tell you the name of the host, eg
$ hostname
gpc-lrgmem01
or
$ hostname
gpc-f107n045
you will need this hostname in the following steps.
Edit ssh config
You will now need to edit your ssh config to allow ssh forwarding so that you can seemingly connect directly to the compute node above. Add the following lines to your ~/.ssh/config file in MacOS or Linux; windows users will have to consult their ssh client's documentation as to how to implement the forwarding:
Host gpc_gw
   HostName login.scinet.utoronto.ca
   User [username]
   LocalForward 20080 [hostname]:22
   LocalForward 20090 [hostname]:11111

Host gpcnode
   HostName localhost
   HostKeyAlias gpcnode
   User [username]
   Port 20080
Replace [username] with your username, and [hostname] with the name of the host from the previous step. This sets two ssh port forwards; one to port 11111 of the compute nodes, which is needed by ParaView; and one is just the usual SSH port 22, which can be used for testing. In future runs of the server, only the hostname in the first stanza needs to be changed.
Start SSH port forwarding
Once the ssh configuration is set, the port forwarding can be started with the command
$ ssh -N gpc_gw
this command will not return anything until the forwarding is terminated, and will just look like it's sitting there. To make sure the port forwarding is working correctly, in another window try sshing directly to the compute node:
$ ssh gpcnode
and this should land you directly on the compute node. If it does not, then something is wrong with the ssh forwarding.
Start Server
Now that the tunnel is set up, on the compute node you can start the paraview server. To do this, you will have to have the following modules loaded:
$ module load Xlibraries python intel gcc intelmpi visualization/paraview38
Then start the paraview server with the intel mpirun as with any MPI job:
$ mpirun -r ssh -genv I_MPI_DEVICE ssm -np [NP] pvserver --use-offscreen-rendering
where NP is the number of processors; 16 processors per node on the largemem nodes, or 8 per node otherwise. The ParaView server should output
Listen on port: 11111
Waiting for client...
Connect Client and Server
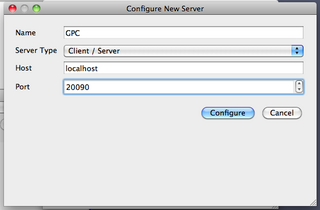
Once the server is running, you can connect the client. Start the ParaView client on your desktop, and choose File->Connect. Click `Add Server', give the server a name (say, GPC), and give the port number 20090. The other values should be correct by default; host is localhost, and the server type is Client/Server. Click `Configure'.
On the next window, you'll be asked for a command to start up the server; select `Manual', and ok.
In future runs, you'll be able to re-use this server.
Once the server is selected, click `Connect'. On the compute node, the server should respond `Client connected'. In the client window, when you (for instance) select File->Open, you will be seeing the files on the GPC, rather than the local host.
From here, the ParaView Wiki can give you instructions as to how to plot your data.

