VNC
From: "Faster remote graphical interfaces with VNC", Techtalk by Ramses van Zon from 14 December 2012
Graphics at SciNet
Even at SciNet interactive graphics are sometimes useful.
One can use ssh X forwarding if an X server has been installed locally (for Linux and MacOS this is often already there by default):
  $ ssh -X login.scinet.utoronto.ca
  $ ssh -X gpc01
This can be slow on low-bandwidth/high-latency connections such as home internet connections.
The VNC setup explained below also applies to the Visualization Nodes.
VNC offers a more suitable protocol for such remote connections. VNC stands for Virtual Network Computing, and basically behaves as if taking continuous desktop snapshots. It uses compression techniques to reduce the required bandwidth, and transfers only the parts of the desktop that are changed. Using VNC with an SSH tunnel and a password is quick and secure.
Why use VNC instead of X tunneling?
Often X is just fine, but:
- Remote X graphics applications require a local X server and transmit many little events and data messages. On a network with high latency, the number of roundtrips needed makes X slow and less responsive.
- VNC typically requires fewer roundtrip is often more responsive.
- X’s speed depends more on the type of application than VNC. (E.g. java applications tend to be very slow over X, but are okay over VNC).
- VNC has some convenient additional functionality, such as view-only connections, file transfer, scaled remote displays, ...
What does it look like?
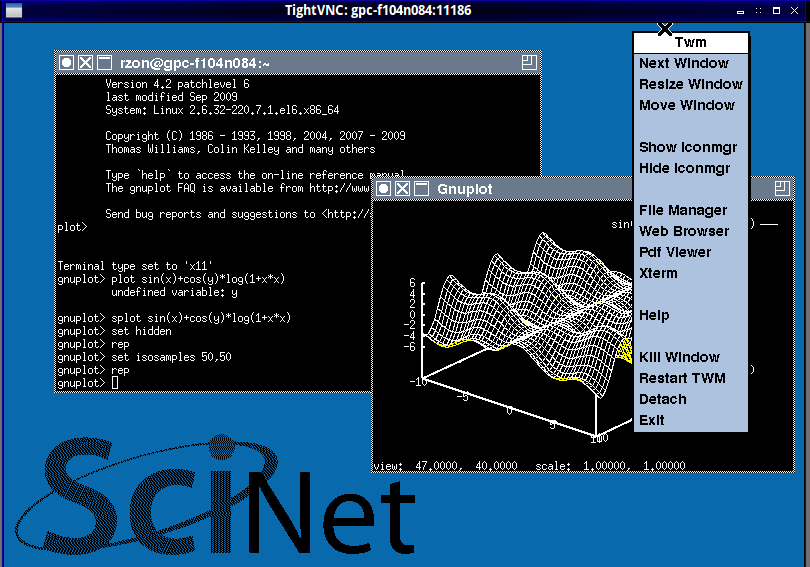
Snap shot:
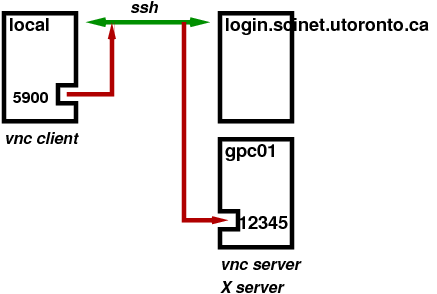
But behind the scenes, it looks like this:
- Ssh encrypts: secure over network
- VNC uses additional password: no exposure through local or remote port.
- Only 1 connection allowed.
These three aspects combine to give a high level of security.
Prerequisites
On your local machine:
- Install a VNC client on your local machine
(TightVNC clients are a good option). - Install an ssh client.
On Windows, you can install PuTTY, MobaXterm, or Cygwin.
Linux and Mac include an ssh client.
On the GPC:
- The VNC server and scripts are in the module vnc.
- This module requires the Xlibraries module.
- You could add module load Xlibraries vnc to the .bashrc.
Setting up the VNC session
- STEP 1: Start the VNC server on a GPC devel node
- STEP 2: SSH tunnel from your local machine to the GPC
- STEP 3: Start the VNC client
STEP 1: Start the VNC session
- First connect with ssh to login.scinet.utoronto.ca
- Once you get a prompt, ssh further to gpc01 (or gpc02, gpc03, gpc04).
- Then type
  $ module load Xlibraries vnc
  $ vnc start
- The command will ask for a password to use (don’t leave this blank!)
- Note down the port number (referred to as "PORT" below) that this command prints out.
Alternative
- Have module load Xlibraries in your .bashrc
- From a terminal, type
$ ssh login.scinet.utoronto.ca ssh gpc01 vnc start
- This starts the VNC server, shows the PORT and waits.
Note: this alternative only works the second time you setup your a VNC session.
STEP 2: Setup a secure SSH tunnel
All external traffic has to go through ssh to login.scinet.utoronto.ca. Luckily, ssh has a feature called port forwarding, which can take a port on your local machine and forward it to the port on the devel node that the VNC server is listening to:
$ ssh login.scinet.utoronto.ca -L5900:gpc01:PORT -N
This assumes the VNC server runs on gpc01, and uses the value PORT for the port number that vnc start returned.
Do not exit this shell, or the tunnel will collapse.
TIP
All communication will go through the tunnel, which should be as fast as possible. Consider using the following extended ssh command:
$ ssh -C -c arcfour login.scinet.utoronto.ca -L5900:gpc01:PORT -N
STEP 3: Starting the VNC client
Any local VNC viewer can now attach to the remote VNC server, e.g. type
$ vncviewer localhost:5900
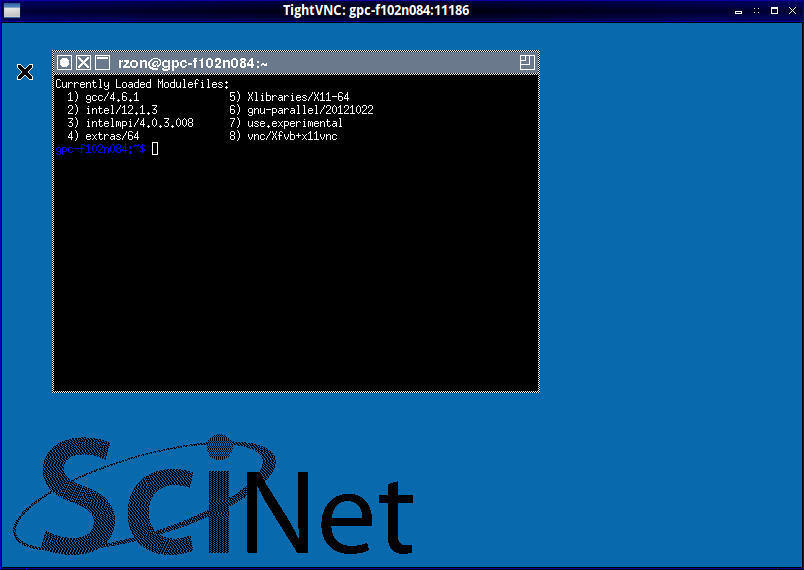
and enter the password for the VNC server. You will then get a ’desktop’ with an Xterm (more about the environment later).
TIP
For efficiency, consider explicitly requesting encodings, e.g.:
$ vncviewer -encodings 'copyrect tight hextile' localhost:5900
or
$ vncviewer -PreferredEncoding 'copyrect tight hextile' localhost:5900
STEP 2+3: Combined using TightVNC
One can combine steps 2+3 when using the TightVNC viewer
$ vncviewer -via login.scinet.utoronto.ca gpc01:PORT
or
$ vncviewer -via login.scinet.utoronto.ca gpc01:ALTPORT
where ALTPORT=PORT-5900.
TIP
To control compression for TightVNC’s combined steps 2+3, can set the environment variable VNC_VIA_CMD, e.g
export VNC_VIA_CMD='ssh -C -c arcfour -f -L %L:%H:%R %G sleep 20'
What do you get?
Client-side usage:
- The light-weight window manager twm has been pre-configured for GPC:
- Xterm is started by default.
- Icon, close, maximize and resize buttons are found in title bars.
- Ctrl-Tab brings successive windows to the foreground.
- A left mouse click on the background pops up the twm menu.
Important: Do not close the window to terminate VNC, use the ’Exit’ option from the twm menu instead.
Implementation:
- Xvfb for the X server
- x11vnc for the VNC server.
Server-side usage
- vnc stop: Stop the VNC and X servers, killing any X applications.
- vnc status: Probes whether the VNC server and the X server are running.
- vnc detach: Restarts the VNC server while keeping the X server and all applications running. The VNC client will disconnect, but a new connection can be made from anywhere.(This option is in the twm menu as well.)
- vnc help: Display a help message about the VNC/X/twm environment. (This option is in the twm menu as well.)
- vnc start: Has a number of additional options
  -r RESOLUTION    Set X's resolution (default is 800x544x16)
  -s FRACTION      Use x11nvc's scaling feature
  -n               Switch on x11vnc's ncache feature
  -b               Blank background
Server-side files and directories
There are a couple of hidden files in your $HOME directory that are used by the vnc setup:
.xinitrc
Initialization of X: start window manager twm and xterm.
.twmrc
Settings file for the window manager twm
.vnc
Directory with encrypted VNC passwords and other settings.
.fr
Directory with settings for FileRunner.
Current Limitations
- Closing the VNC viewer window instead of using Exit in the twm menu keeps the X server running on the devel node without VNC reconnectivity.
- No VNC server on compute nodes. However, you can X forward from within VNC to a compute node on which you’ve got a job running.
- Client-side caching is supported by x11vnc and invoked with vnc start, but the buffers are visible in the client.
- Not on the tcs, p7, arc, or bgq.


